
For Memorial Day I participated in the Operation Write Home's Blog Hop. You can read the post HERE.
This was card I created.

I have received many complements and questions about this popped up star.

So today I am going to share how it was created. First I started with a 1 3/4" star cut from the Art Philosophy Cartridge on the Cricut.

Next using your paper trimmer line one point and one valley of the star up on the cutting track.

{Note: You do not need to color every embossed line. The colors are just to show you where the marks are made}
Take a embossing stylus and emboss every point from end to end.

This is how it should look face up after embossing.

Now fold on each line and reinforce each crease with your bone folder.

To get the final valley and point look, pinch the point of each star to the center while folding the smaller valleys downward.

Your Star should now look like this.

Finally to complete the look sponge the edges and creases using Pacifica.
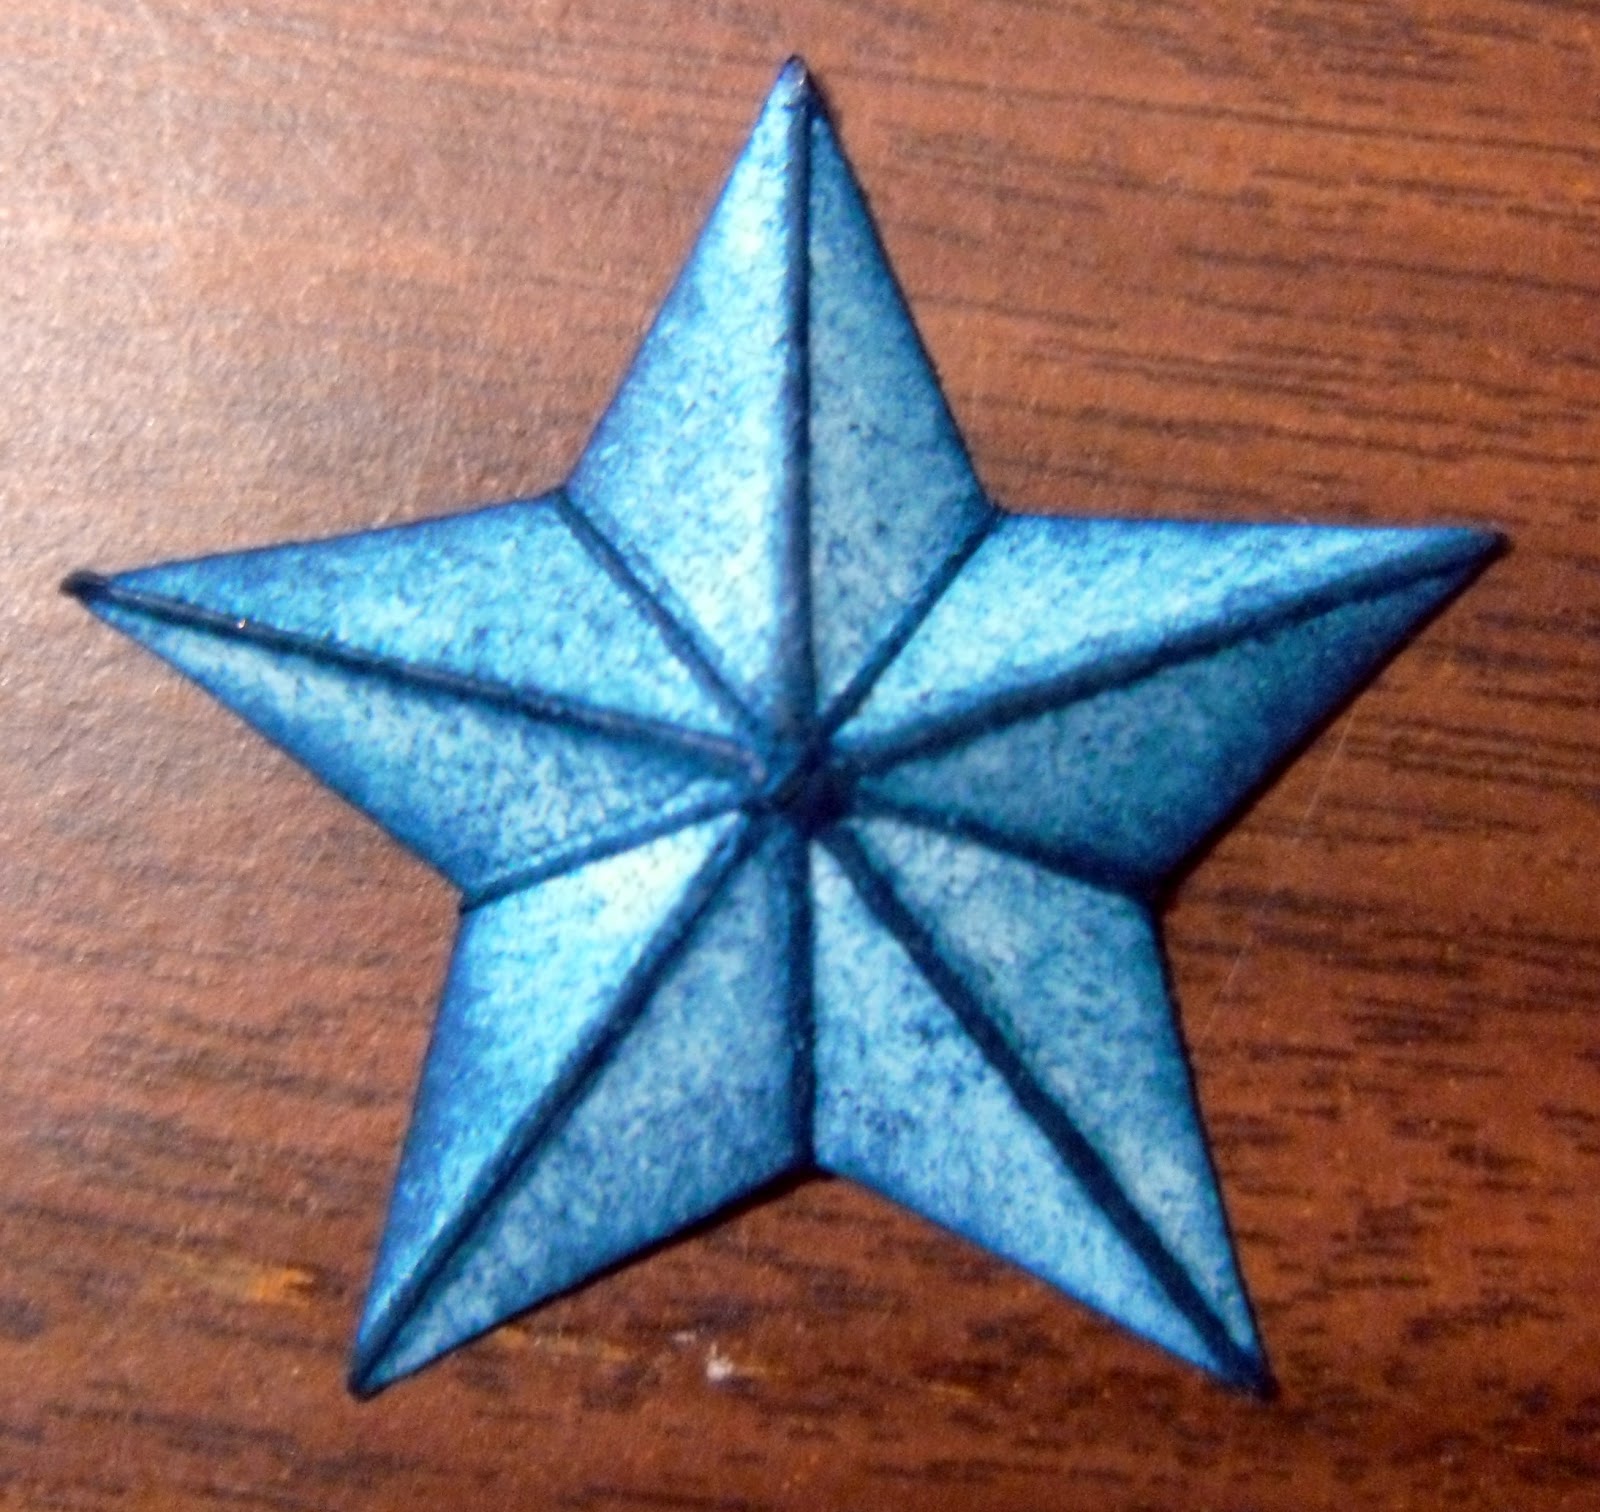
Here is the finished star.

To keep the dimension use one smaller and one larger square of 3D foam tape stacked on top of each other. The smaller square is attached to the star, the larger is attached to the smaller and then to the next element.

Here is a close-up of the star element attached to a square piece of White Daisy cardstock sponged in Tulip with the sentiment stamped in Pacifica.
I hope you enjoyed this tutorial. If so leave me some love to let me know how I did.
Supply List: (All Close To My Heart
Cardstock: White Daisy & Craft
Ink Stamp Pads: Pacifica & Tulip
Adhesive: 3D Foam Tape & Dotto Runner
Tools: Paper Trimmer, Embossing Stylus, Bone Folder, Sponge, & Art Philosophy Cricut Collection.
~ Chandel
No comments:
Post a Comment